7 min read
Put an Okra Row Within Reach of a Daily Picking
Lay out the row so you can see small pods through the leaves, and use one early cut to learn what tender means for your variety.
On this page
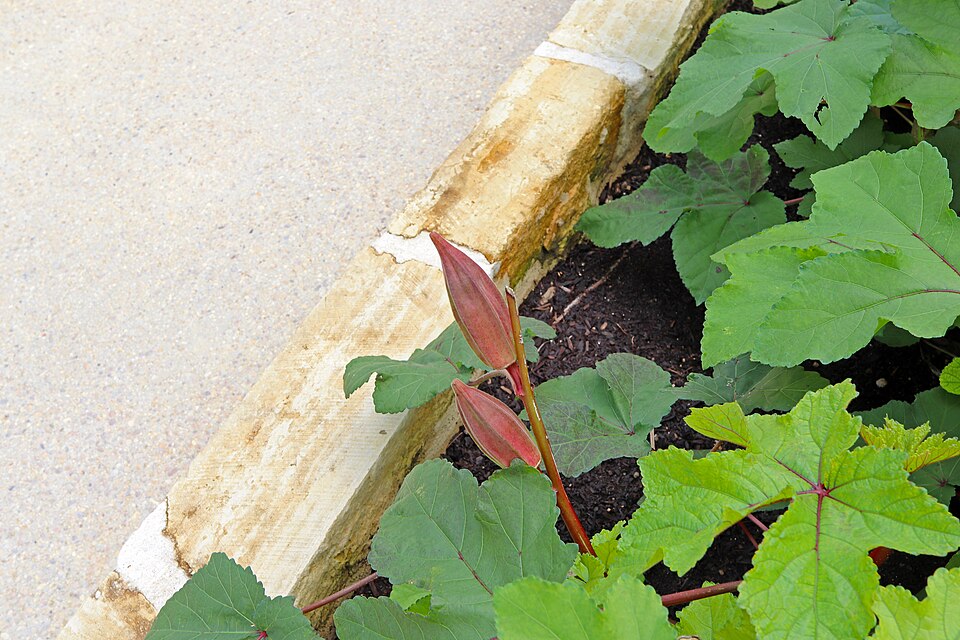
An okra pod can seem too small when you stand at one end of the row and surprisingly large when you find it again a few days later. The difficulty is seeing it in time. Tiny pods start near the flowers among sizable leaves. As they grow, the plant makes new ones higher on the stem, and an older pod below can be overlooked. Design a row you can inspect easily, before the seeds have even gone into the ground. The first few weeks of harvest will make that planning more valuable than another foot of row.
Okra is a heat-loving annual, Abelmoschus esculentus. It does well in sun with warm soil and a sufficiently long growing season. Choose a variety with a height you can handle. Some forms stay relatively short, and others mature into tall plants with a fairly wide reach. If you live where the warm season is short, use regional guidance about variety and transplant timing. The root area must be ready for growth when you put the plants outside. An early date on the calendar does little good if the plants sit in cold soil.
Lay out a short row with one open side
Find a sunny position with freely draining soil. Stand where you expect to pick and check whether you can reach the plants' centers from there. Reserve a little more clearance than the leaves of a seedling suggest. A higher plant can lean or extend across the edge as its stalk thickens. A short straight row with an open side may be easier to inspect than a deeper block. If you can walk round both ends, you can approach the harder-to-see pods from a different angle without pushing between plants.
Think about heat, wind and the shade the crop will cast. Okra usually needs a warm site, but a wall or fence can reduce access or obscure part of the plant. Put seed where nearby crops will still have the light they need, and leave enough room that the foliage dries between wet periods. Use the listed mature dimensions when choosing spacing. A tall strain in a small bed might be useful if there is a clear route beside it, while a compact strain works better where the main task is picking at an easy height.
Take a shallow tray or basket out before you mark the row. Check whether you can set it on stable ground while handling a pod. Look at the way a gate swings or the part of the route that becomes wet when you irrigate. A little practical floor space can turn a difficult daily job into a quick visit. This matters during the hottest part of the growing season, when pods can move through their best picking stage in a short time.
Wait for the conditions that support warm growth
Sow outside once frost risk has passed and the soil has reached suitable warmth, following the variety and regional recommendations. In a shorter growing season, you may choose an early variety and start a few plants under cover. Raise them with enough light to stay sturdy and acclimate them to outdoor conditions before planting. Set them out when the soil and forecast make sense. A fragile transplant put into an exposed warm spot too abruptly can stall even when air temperature is ideal for older plants.
Sow or plant at the spacing appropriate to your variety. Water to settle the row and check moisture as the roots grow. Aim for reasonably even moisture during establishment and as flowers and pods develop. Established okra can handle some drought, but a crop going through extended dry weather may have poor growth or less useful pods. Sample the soil below the dry-looking surface before adding water. In a bed with a low section, inspect whether water stands there longer than at the other end.
Keep weeds down while you can still reach the row easily. Work around the roots without cutting too deeply. If a little loose surface mulch is appropriate after the soil is warm, leave the stems free. Look at what happens after rain or irrigation. An overhead shower may wet the leaves and leave some of the root area below almost dry. Water the soil slowly enough to reach the roots when it needs a full soak. The plants should have the moisture they can use without remaining in wet ground.
Find the first pods and write down their usual size
When you see the first flowers, choose two plants to watch. Note the position of each flower on its stem. Return soon and compare the small pods where flowers have faded. This shows how quickly the first pods advance under your current weather. Look from the opposite side when the main leaf shades the stem. When the plants are compact, it is a good time to learn where each new pod develops and how a small one feels before its skin toughens.
Many garden varieties are picked when pods are roughly two to four inches long, or about five to ten centimeters. Some can remain tender at a different size, and conditions can change how fast the skins become fibrous. Take a first sample while it is small and firm. Cut it in the kitchen and check how easily the blade goes through. Compare the tip and the larger part near the stem. If the skin pulls into coarse strings, use a smaller size next time. The useful number is the length that gave you a good crop of your variety this week.
Do not judge the whole row by the oldest pod. New growth higher on the stem may be giving you better ones. If the weather turns much hotter, shorten the interval between inspections. A brief check every day or two during peak growth can be worthwhile. You can get a sense of the interval from two pods marked on a garden sketch. A few spare days can make much more difference in heat than the same time in cooler conditions. Give the row a regular look instead of expecting the first benchmark to hold for the whole season.
Cut the stem and give the pods a cool place
Use clean sharp shears to cut each tender pod from its stem. Wear gloves and sleeves if the fine hairs irritate your skin. Avoid tugging against the main stalk or reaching through plants in a way that bends new branches. Hold the pod gently, cut, then put it directly into the tray. A wide shallow container can protect the fresh pods from being crushed under later pickings. Carry them out of the heat promptly and use normal produce handling and storage practices.
Remove overgrown pods if you intend to continue picking tender ones. Leaving mature pods for seed can reduce later production. Mark any stem you intend to retain for a separate seed purpose so you can tell it from something you overlooked. Clear obvious poor or damaged pods separately from sound food. Check the bases of the plants before you leave. Larger pods below the main leaf layer can be hard to see when most of your attention is on the new growth above it.
Keep a useful rhythm once the row is producing. Start at the same end for one visit and reverse for the next. Check the lower nodes first and then look up through the new leaves. If you regularly miss the same corner, open a clear way to stand there instead of pruning an entire leaf canopy for visibility. A low branch on the neighboring plant can be the real obstruction. A small adjustment can make the next picking easier without sacrificing productive growth.
Bring the tray to the row rather than carrying several pods in one hand along the path. On tall plants, work only at a safe reach from level ground. If the tallest nodes become difficult to see, make a note for the next seed order. A lower plant could give you more usable harvest from the same bed.
Use the final harvest to plan the next row
Compare the handful of pods you used from each part of the row with the ones that became too tough. Note whether the tallest plant was the most useful or merely the hardest to inspect. If the compact plants supplied plenty of tender pods and made the best use of the space, keep their site and grow a manageable number. If a sheltered sunny corner was warmer and gave early pods, reserve that ground for your first few plants next season.
Measure the distance you could comfortably reach from the path before the foliage is cleared away. Give the next plants enough of that same room. It is easier to stay with the quick picking rhythm when you can see the developing pods and have a place to put each one as you cut. That is what turns a warm-season plant with a heavy canopy into a crop you can keep using.
Further reading: University of Maryland Extension guide to growing okra.