7 min read
Renew a Crowded Chive Clump in the Same Spot
Diagnose a sparse center, lift the usable bulbs and replant a smaller group without losing your established herb bed.
On this page
The change in an old chive clump often starts in its center. At the edge, shoots still rise in a neat ring. In the middle, leaf bases are packed tightly together, the soil is hard to see and a few old stalks stand over very little new growth. A plant that was once easy to clip can become an untidy bundle. Look first at the conditions, then decide whether to divide it. One healthy section returned to the same spot can restore the space and keep the established bed in use.
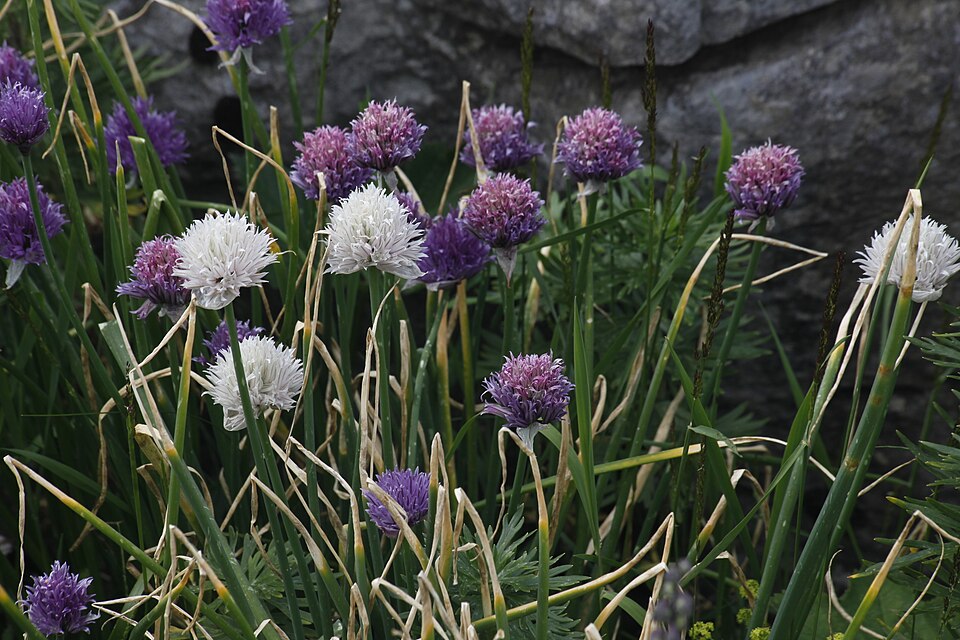
Common chives, Allium schoenoprasum, grow from small clustered bulbs and produce hollow tubular leaves. The small pink to lilac flowers cluster into rounded heads. It is a different plant from garlic chives, which have flat leaves and usually white flowers. Keep a reliable label with culinary stock rather than identifying an unfamiliar clump by smell alone. The project here starts with an established common chive clump that used to do well and is getting harder to tend, either in a bed or at the same edge in a container.
Check why the center is weak before lifting it
Look at the clump while it is in active growth. A tight mass of older bulbs surrounded by new upright leaves can suggest crowding. Across the entire patch, thin pale growth may have to do with changing light or conditions in the soil. A woody neighbor that now shades the herb can have a larger effect than the number of bulbs. Check how long light reaches the leaves and feel the soil below the surface. Common chives generally suit sun or some part shade, with free drainage and steady moisture during active growth.
In a pot, examine how water enters and leaves the mix. It can run straight down the side of a contracted root ball without wetting many roots. A pot tightly filled with bulbs or a root mass that has reached the drainage holes can benefit from attention. A pot that stays wet for days despite slow growth needs a drainage check as well. Look for firm healthy bases. Soft or decaying material warrants a closer investigation. Do not return unhealthy bulbs to the reworked bed simply because they were originally part of the clump.
Mark the old outline and the true center. The healthiest bulbs may all be on one side. Check for neighboring weeds that have threaded into the roots. An established creeping weed is easier to see once the clump has been lifted, but you want to recognize it before replanting. Decide how wide the renewed clump can become before it reaches another planting. The ideal result may be a more modest group in roughly the same place, with loose ground you can inspect around the edge.
Work while the plant can settle again
Choose a suitable cool period with workable soil, often early spring in a temperate garden. In suitable climates an autumn division after strong heat has passed may work if roots can establish before severe cold. Consider whether you can water afterward. Keep the new space ready before you take out the clump. Remove weeds and loosen the soil without turning a deep pocket into a place that holds water. In a pot, clean the container and check holes, then prepare appropriate loose medium. Choose a size that fits the remaining roots rather than simply using the largest available pot.
Water a dry root ball before working and let it drain. Lift the plant from below using a fork or hand tool, protecting surrounding plants. Support a container root ball from underneath as you ease it out. Tugging a bunch of leaves can pull them loose without helping the bulbs. Set the clump where it is stable. A shallow tray gives you a place to keep soil and see thin roots. Start separating at the edge and find a natural opening between sound groups. Use clean sharp tools only where a tight section resists gentle separation.
Choose one portion with a useful number of living bulbs and intact roots for the original spot. It need not include the whole ring. Remove dead parts and unwanted weed roots appropriately, separating them from the group you plan to keep. Avoid leaving deep pockets of loose debris in the planting hole. If there are spare sound sections, replant promptly in separate suitable spaces or pass them on where appropriate with the original identification. The success of this job can be measured by one good clump, even if you do not need the rest.
Leave the renewed group room to thicken
Lay out the smaller section and compare its width with the outline you marked. Plant it at the depth it grew before, with soil around the roots and leaves above the surface. Settle the ground firmly enough to hold the section and water gently. The bed should have room to receive water without pooling over the leaf bases. Keep any light mulch back from the growing points. A short clear margin around the new clump makes it easier to see which leaves are expanding and where you need to remove the next weed.
Check how the section responds to its first warm period. A small root ball can dry faster than the old mass. Put a finger or trowel just below the surface near the bulbs and water as needed, allowing excess water to drain. Pay attention after the first heavy shower. If the soil slumped and left a few roots exposed, lift or reset the section appropriately while it is still small. If new leaves extend while the bases remain firm, leave it in place and let the roots spread. A plant that has become easier to observe can often be cared for with small changes.
Do not fill the open margin immediately with another perennial. It gives you room to see how the patch is moving and keeps ordinary neighboring weeds within reach. Place a small marker at the original edge and take a photograph from above. Compare this position later in a year of normal growth. The next time you decide how much to divide, you will have a useful estimate of the size the patch actually reached, rather than only the size you remember from flowering.
If the revived patch lies beside paving, check one marked gap near the edge after a few weeks. Notice whether water penetrates beside the roots or runs onto the path from dry soil. Weed that area gently while the new shoots are still distinguishable. If the old clump was tall enough to hide a small drainage problem, the open margin is a good chance to fix it. Leave one section with no neighboring root competition. Compare its new leaves with the ones on the far side before deciding how close to put another herb.
Resume harvest when fresh leaves have extended
Leave the newly planted section time to make healthy growth. Take a few leaves after it is clearly establishing rather than removing most of its foliage as soon as you see an upright shoot. Clip only sound identified culinary leaves grown and treated appropriately for food. Use clean scissors and ordinary washing and produce handling. Leave usable green growth to support the bulbs. If the ends dry in a spell of warmth, check the root area and give it time instead of cutting the entire young clump back again.
If a sturdy established plant has finished flower in a suitable season, Wisconsin Extension describes cutting mature older material back to roughly three inches to encourage new tender leaves. The newly divided group benefits from care appropriate to its stage. Try a lighter selective harvest first and watch the response. Let any flower heads finish if you want the display and the clump is strong enough. Snip spent stalks before ripe seed drops where volunteers would be unwanted. Keep seed-bearing waste contained and inspect open ground around the herb later.
Let the next season tell you how often to repeat the work
Return when the clump starts active growth the following season. Look for new leaves in the middle as well as at the edge. Check how readily water enters the root area and whether nearby weeds remain manageable. A clump that still supplies healthy new leaves and can be reached without pulling at the base can stay in place. An old plant does not need lifting on an exact anniversary. Revisit the reasons that first made the job useful: fewer vigorous shoots, a crowded pot or a center you could no longer see.
If the center stays weak while the soil behaves normally, review light and how much healthy root you replanted. A planting that was divided at the right time can still take more than one growing stretch to fill out. Give it room and keep harvest modest while it returns to useful size. One firm well placed clump can fill the same role for years, with a clear edge and enough healthy new leaves to make the small harvest easy again.
Further reading: University of Wisconsin Extension profile of common chives.