7 min read
Keep a Young Thyme Plant Beside the Old One
Use leafy stems from an aging pot of common thyme to start its replacement before the woody center opens up.
On this page
Look down into a long established thyme pot and you may see most of the leaves gathered around its edge. The center consists of old gray stems, with bare soil showing between them. A plant at this stage can still be useful for several months. There may be good shoots for kitchen use, flowers for insects and enough young growth to root a replacement. Those jobs call for different cuts. Leave a few vigorous stems on the original plant while you give the next one time to start.
Common thyme, Thymus vulgaris, is the upright aromatic herb often grown for its small leaves. Old stems naturally become woody. More light and a careful trim can improve the appearance of the softer growth, although a bare woody center may stay bare. If the plant once filled its pot and now gives just a small handful of shoots, measure success by the fresh growth you can use this year and the young plant you can set beside it.
Inspect the pot and the living ends
Set the pot somewhere bright enough to see where each gray stem becomes green. Place your hand under a branch and follow it toward the center. The parts to keep have leaves along them, especially close to the outer end. A flexible, leafy shoot is a better source for propagation than a twig that snaps dry. Look at both sides of the clump. A plant growing against a wall or another large herb may lean toward daylit space and carry far more live growth on one side.
Take a minute to compare the amount of bare stem with the soil moisture. Lift the pot if you can do so safely. When the mix has stayed wet for days, a heavy pot and yellowing shoots can suggest a drainage problem. Check whether water can actually leave the bottom and whether the pot is sitting in a dish of collected rain. Where old roots fill the pot, water can also pass through in an uneven channel while leaving dry mix farther in. An established herb needs a root zone that drains and can still take up water.
A plant with a few freshly damaged ends may simply have suffered during a cold or wet period. Remove clearly dead twigs when you can see new buds. Check the species and hardiness of the plant you bought before deciding whether it can spend the winter in an exposed pot. Even a hardy thyme can have trouble where a container freezes solid, stays wet for days, or keeps thawing and freezing against a wall. Under suitable winter shelter, keep some light and ventilation around it.
Where the whole plant looks weak, a replacement from a nursery is a sensible option. It gives you a healthy root ball without requiring the old thyme to supply good cuttings. Move the young plant to a bright site with better drainage before putting it back in the old placement. If you can still take a healthy shoot without stripping the original plant, it is worthwhile to try rooting it while it is available. A small trial also teaches you which part of the pot produces the strongest growth.
Decide which shoots to keep for cooking and flowers
Use clean scissors to take a few leafy sprigs from several parts of the plant. Leave usable leaves beneath the cut and avoid clipping back into bare wood. The newest shoots often have the best flavor. Handle any culinary plant according to the way it has been grown, particularly if it has recently come from an ornamental display where garden treatments may have been used. For ordinary kitchen use a small fresh harvest is more convenient than trying to rescue every last leaf at once.
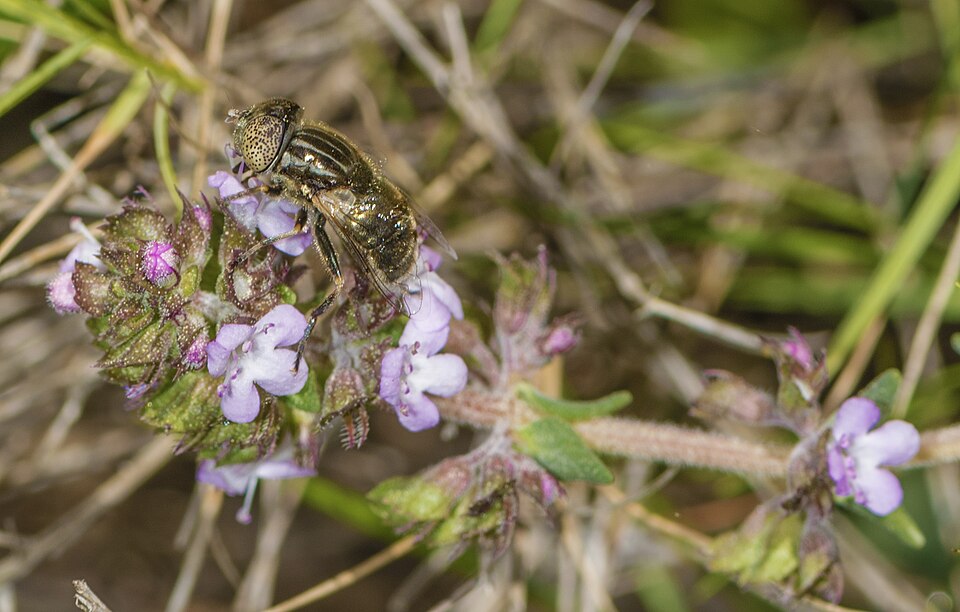
A clump just starting to flower offers another choice. Let one side keep its budding tips and harvest from the other. Small pale blooms may draw flies, bees and other visitors. Look for hoverflies hovering just above the flowers before they land on an open bloom. Watching the plant for a few minutes on a calm day is a good way to see how much use a small flowering branch may get. If the bloom side lies against a wall, rotate the pot or give it more room before the stems get longer.
Trim back some spent flower stems after the display has finished. Follow them to green leafy growth before cutting. It may help to use smaller scissors if long hedge shears would catch adjacent branches. Some stems naturally trail outward. You can let them remain long enough to keep the clump covered, then remove their oldest tips after the new plant fills in. The old plant serves a useful purpose while you wait for the young one to grow enough roots and tender shoots for harvest.
Set up a small clean pot for cuttings
Prepare a pot with bottom drainage and a clean, light propagation mix. Water the mix and let excess run through before taking the first shoot. In late spring or early summer, choose a healthy, flexible stem without flower buds if possible. Cut just below a point where the leaves join the stem. Strip the lower leaves gently and leave foliage at the top. Use a pencil or similar tool to make a small hole in the mix, then ease the bare lower stem into it and close the mix around it.
Several shoots can be tried in separate small pots or spaced apart in one pot. Keep them where you can see whether each is still upright. Bright light out of strong midday sun helps a cutting while it has few roots. Keep the mix slightly moist and avoid drenching it. A ventilated cover may slow moisture loss on very dry days. Check it so condensation clears regularly, and lift it away from any leaf that touches the surface. Wet, crowded leaves can deteriorate before you see signs of rooting.
Label the pot with the name and a date. A sprig of thyme can stay green for a while on the resources it started with. New growth and roots emerging in the container together are better evidence than leaf color alone. Avoid pulling repeatedly on a small cutting to test it. Once there is a useful root system holding the mix, transfer it to its own pot, disturb the roots as little as possible and begin giving it more light gradually. Pinching can wait until you see several growing tips.
Another approach is to put a low outer stem in contact with the surface of damp, free-draining mix while it remains attached to the old plant. Keep its tip above the surface. A small pin or stone can hold a flexible part in place. If it roots while still supplied by the mother plant, cut between the two and lift the rooted portion with its mix. Layering is useful when space allows a second pot under a branch. Cuttings fit better where the original pot stands on a narrow ledge.
Pay attention to the speed at which different shoots take root. An outer twig that has already toughened may take longer than a flexible tip from the same branch. If one part of the propagation pot dries first, move the cuttings to individual pots next time so they can be watered separately. Small pots standing together in a tray are easier to move into shelter, and you can remove one that has failed without disturbing the rest. As the young plants settle, note which of them keeps its form with the least clipping.
Give the replacement the conditions the old pot lost
Choose a pot only moderately larger than the rooted plant so the small root system can use the surrounding moisture. Open drainage holes matter more than the pot style. Place the thyme where it receives generous sunlight and air. Start with fresh freely draining mix rather than taking packed soil from the middle of the old pot. Keep the base of the little plant at about the same depth and water it in. Then observe the rate at which the fresh mix dries.
When the plant has begun growing steadily, pinch a few stem ends to encourage branching. Harvest lightly at first and keep several leafy branches to make energy for continued growth. If stems begin leaning hard toward one side, look for shade from nearby pots before merely turning the container. Turning it can help a plant fill out evenly when conditions are already good. A sunnier location will help more when only a small part of the plant sees direct light.
Keep both pots for a short time. The established clump can continue to flower or supply leaves while the new one develops roots. In a warmer sheltered site, you may be able to let the old plant carry a second season. If it repeatedly dies back or has almost no active tips left, the young plant can take its place. Keep the label with whichever plant you use and make the next cutting while the stems are still vigorous. A sunny spot with good drainage, a few modest harvests and a correctly timed replacement can keep one variety in useful growth across several pots.
Further reading: RHS guide to growing thyme.